We all love Linux, right? Well, not everyone or every company. At least they bring-out their software for Mac OS and/or Windows, only. Which is a shame, no further explanation about that is needed, I guess 😉
Hence, we decided to write this installation guide to show you step-by-step how to setup Windows in a VirtualBox. Just for the applications that weren’t released for GNU/Linux operating systems. Furthermore, we will explain how to set-up some awesome functions including bi-directional copy-paste from the VirtualBox to the host system (and vice versa), as well as the shared folder function and USB support!
![]()
Please note that it is necessary to use a default signed Ubuntu kernel. Otherwise, you might encouter problems using VirtualBox.
Step 1: Download and install VirtualBox
So we start by opening a Terminal (CTRL + ALT + T) and entering the following commands to first update needed dependencies and then install the VirtualBox application:
sudo apt update && sudo apt upgrade -y
sudo apt install virtualbox virtualbox-ext-pack virtualbox-dkms -y
On the image below (right side), you see the terminal window, we do advise to have some basic experience in using this application before starting to do things like installing VirtualBox. If you have the basic know how then we will continue on now.
After entering the commands above the basic VirtualBox application should be installed correctly and we are ready for step 2.
Step 2: Open the VirtualBox application and create a new virtual machine with Windows
Go to the start menu and type: ‘VirtualBox’ (without quotes), hit the Enter key and the application should show up.
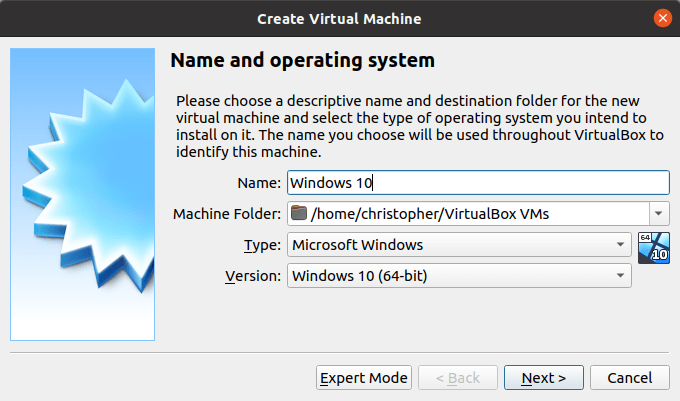
Select New, and then start by setting up the virtual machine (Name, location and OS type / version).
For this Tutorial we will be creating a Windows 10 installation, but following this article exactly also works for Windows 11. You could pick a different version if you want.
Usually If you type the name of the operating system that you wish to install it changes the settings to the right values. Please do double-check it this will safe you time and frustration later on.
Step 3: Allocate resources for the virtual machine
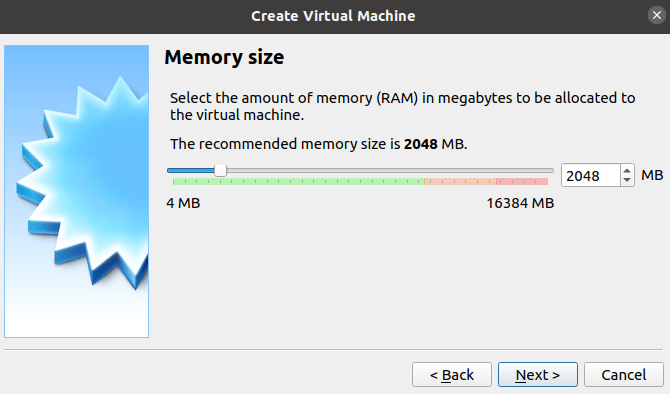
Once you press next in the previous step, the memory allocation screen will show up.
Standard it is set to allocate 2048 MB for Windows 10, we advice to at least double it to 4096 MB, depending on needs and amount of RAM available of course. It is also good to know that Windows 11 needs at least 4096 MB.
Then you press Next and we will continue to the next screen.
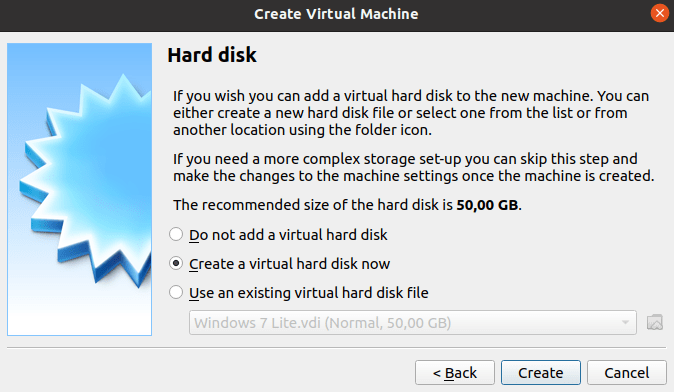
Next up is the creation of a virtual hard drive, for the installation of the virtual machine. The default option of creating a new disk is recommended.
It says recommended 50 GB, we do recommend to chose a dynamically allocated size and setting the maximum size according to the needs. 150 GB should be more then plenty in most cases.
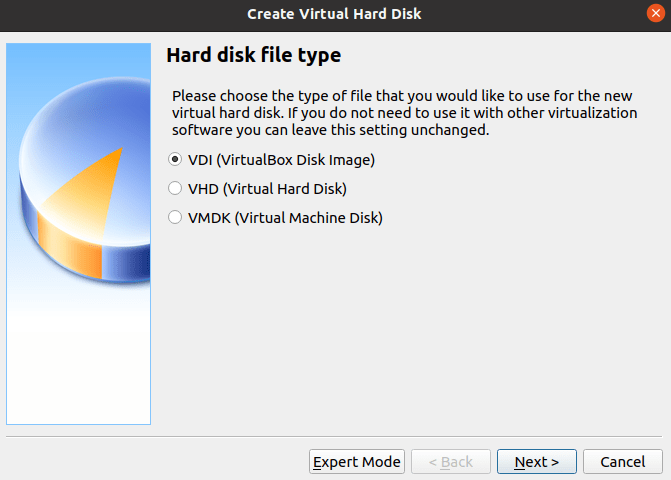
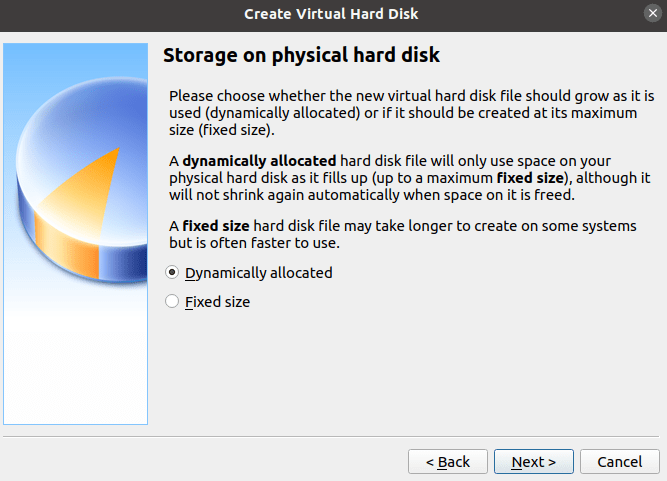
Once you have selected Create in the previous screen, then this will show up. Once again the default should be fine, unless you have specific reasons to select a different method of storing the virtual machine data.
Press next again for the next screen.
Here you can select if you want the disk file to be a fixed size or Dynamically allocated. Dynamically simply grows with the size of the virtual machine. We recommend this option. Now, click Next >.

Here you will specify the (maximum) size of the disk file and in what location to store the file.
Even though VirtualBox recommends 50 GB, this can be a bit small if you want to store enough data and/or applications, considering that Windows itself already needs about 25 or 30 GB of the storage capacity. Sometimes, Windows needs even more, temporarily for example when it is updating. This is why we recommend to choose more, like 150 GB, especially when you have selected a dynamically allocated virtual hard drive.
Allocating the basic resources should be complete once the disk has been created.
Step 4: Setup the virtual machine and add the installation medium
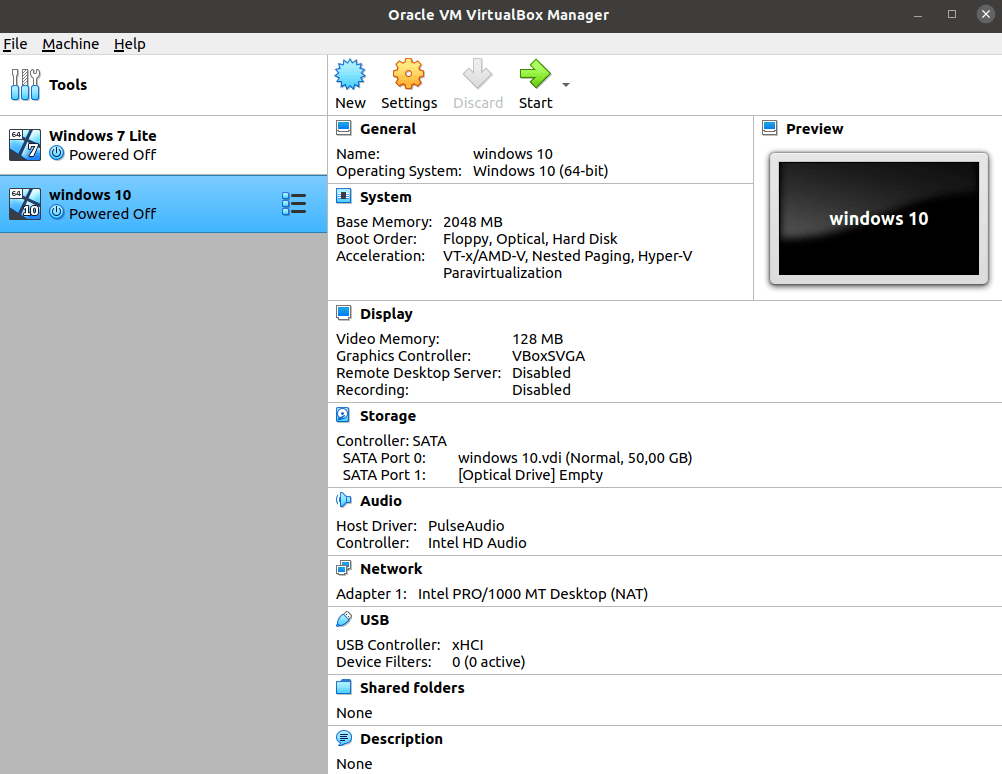
The result of the steps above should make it somewhat like this (next image), next up is selecting the installation medium. We will use the .iso file from the Microsoft website.
Official Microsoft windows 10 ISO file Download link:
https://www.microsoft.com/en-gb/software-download/windows11
While the ISO file is downloading, let’s tweak some additional settings. Click on the gear of your brand new created VirtualBox! You will see a window that looks like the next image.
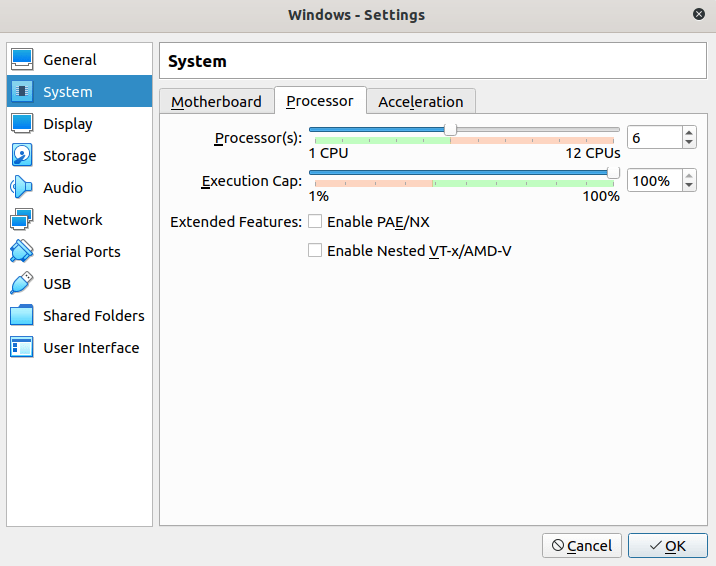
Now, navigate to System -> Processor and select more CPUs to improve the VirtualBox’ performance. Do not select too many CPU threads, as the host system performance would decrease.
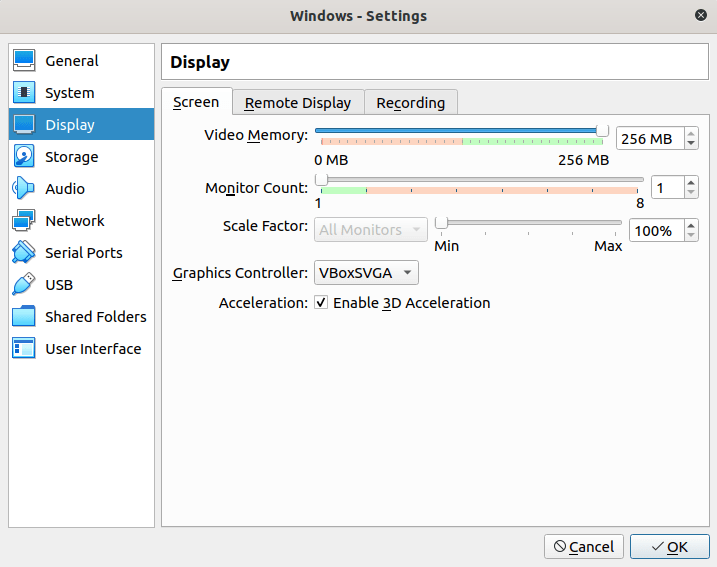
We also recommend to enable 3D Acceleration under the Display -> Screen tab. We also change the allocated video memory to 256 MB.
We recommend to pass through all settings to customize other settings to your desire and click OK to close the Settings window.
Now let’s start up our brand new VirtualBox! A pop-up will show up that asks you to boot to an optical drive. We can simply select the downloaded ISO file to boot. Click on Choose a disk file, then go to the folder where the .iso file is located, probably in the Downloads folder. Select it and proceed to start the virtual machine.
For the purpose of keeping this tutorial as short and comprehensive as possible, we will not show how to install Windows. For this, we would like to redirect you to the YouTube video on the right side.
Important note for Windows 11
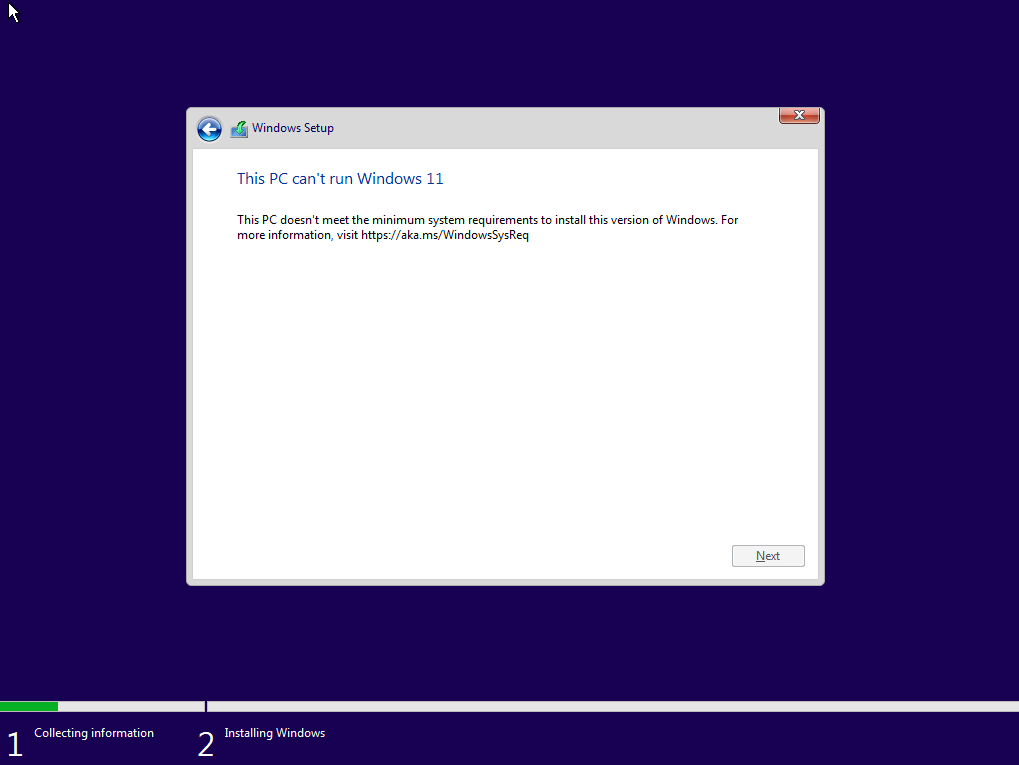
Officially, Windows 11 requires Secure Boot and TPM 2.0. These features are not (yet) available in VirtualBox. The result is that you will get the error as you can see on the right image.
To bypass these settings, click on the X icon at the right upper corner and quit the setup. Hold the SHIFT key and press F10. Then give the command ‘regedit’. Navigate to HKEY_LOCAL_MACHINE\SYSTEM\Setup and create a new key (folder) here named ‘LabConfig’. Within this key, create a new DWORD (32 bits) value named ‘BypassSecureBootCheck’. Create another DWORD (32 bits) value named ‘BypassTPMCheck’. Don’t forget to set both values to 1!
Step 5: Boot the virtual Windows environment and alter the required settings
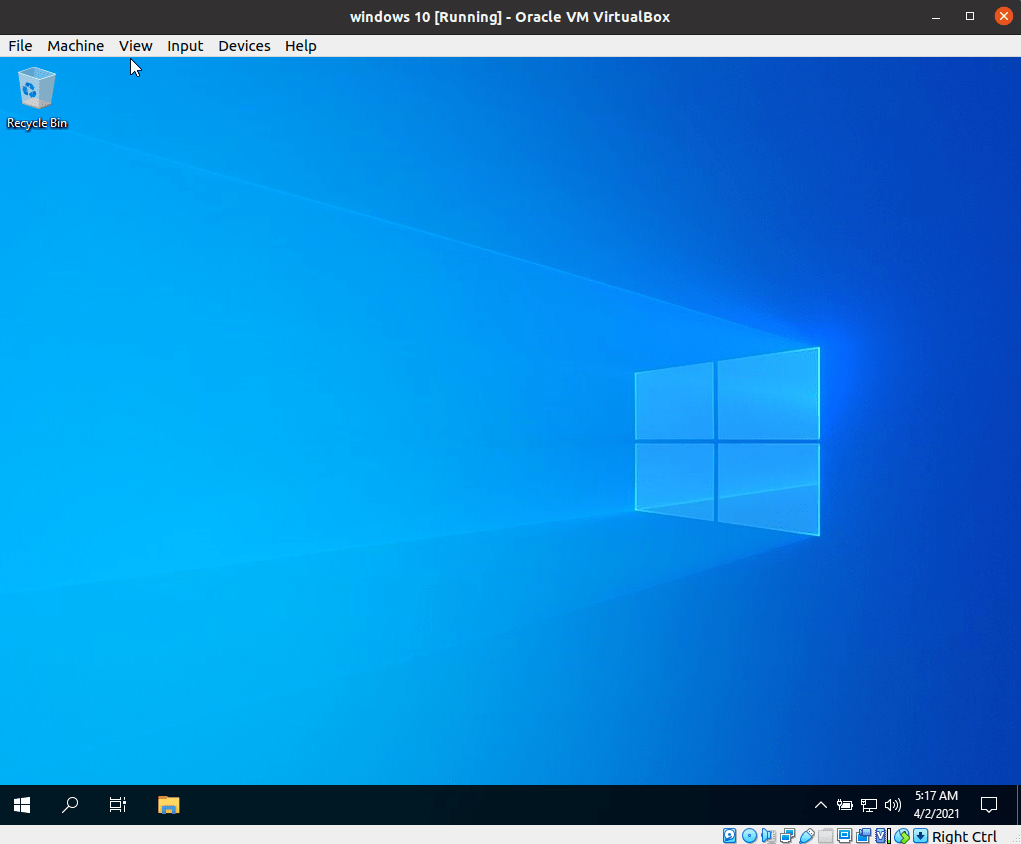
If you successfully installed Windows 10, the Windows start screen looks like this.
Next we want to have some awesome additional features, such as:
- Shared folder, to easily transfer files from and to the VirtualBox
- Bi-directional clipboard, to easily copy and paste from and to the VirtualBox
- Bi-directional drag-and-drop, to easily drag-and-drop your files from and into the VirtualBox
- Additional drivers for better performance and the ability to set the screen resolution
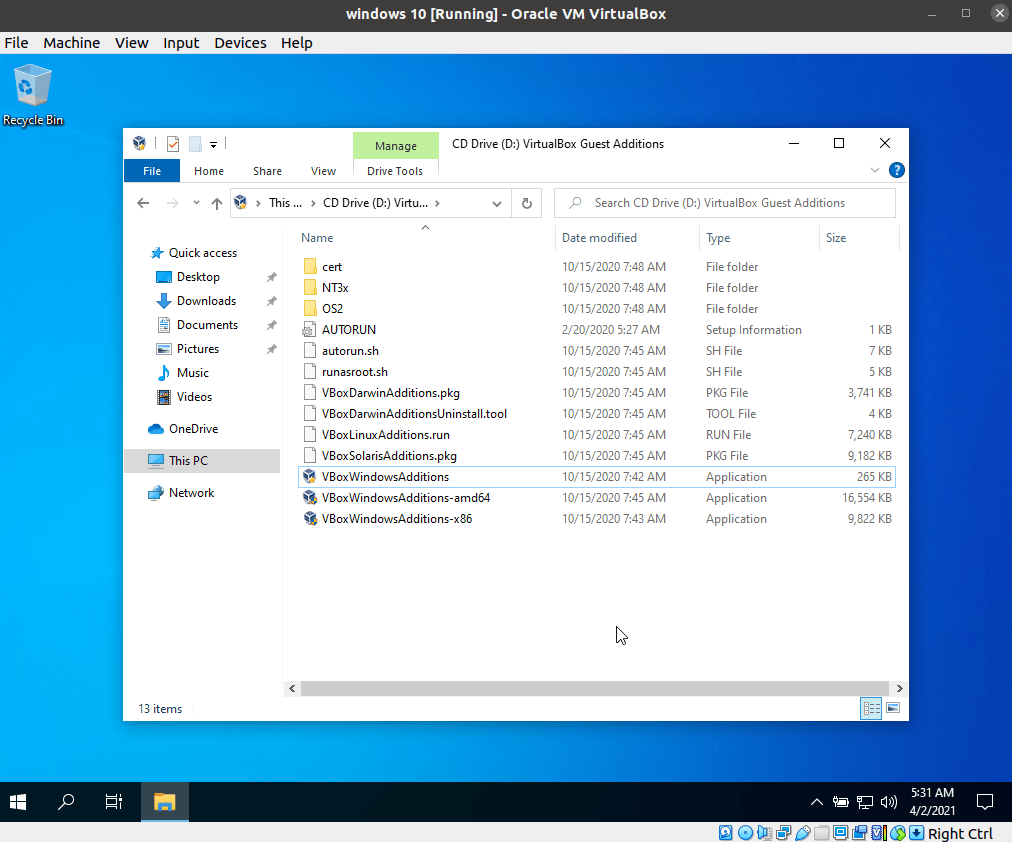
To accomplish this, we will have to install the guest additions software of Oracle. Installing the Guest additions add-on is pretty straight-forward, luckily. On the top bar of your virtual machine, click on Devices -> Insert guest additions CD image. Then you can find the VirtualBox Guest Additions virtual CD drive under the file explorer -> This PC. Now run the setup: just double-click the VBoxWindowsAdditions executable file.
After the installation, you should be able to set a shared folder, set shared clipboard to bi-directional and set the bi-directional drag-and-drop function. For the shared folder, we recommend usning your Downloads folder in Linux for your VirtualBox Downloads.
It might be handy to increase the resolution if the VirtualBox. To accomplish this, you can select the Display-icon at the bottom-right of the VirtualBox (![]() ) -> Virtual Screen 1 –> Resize to 1440×900. If you see that your graphics may become blurry or jerky, you can disable 3D transparency effects by right-clicking on the desktop, then select Personlize -> Appearance –> Disable transparency effects.
) -> Virtual Screen 1 –> Resize to 1440×900. If you see that your graphics may become blurry or jerky, you can disable 3D transparency effects by right-clicking on the desktop, then select Personlize -> Appearance –> Disable transparency effects.
Step 6: enable USB pass-through support
Your user needs to be added to the VirtualBox group in order to get USB support. Open a terminal window in your host OS (usually CTRL+ALT+T) and execute:
sudo usermod -aG vboxusers $USER
sudo newgrp vboxusers
Now restart your computer. USB support should be active now!
Congratulations, your VirtualBox is now fully ready to be used.

